Sunday, 3 November 2019


As an introduction though, why not go to the Blog overview first.

www.aerocyclecars.com


01273 843749 07976 312058

Some very inspiring close up shots of a client's car.


This car in my view, ranks as the best client finished car, in fact the best finished car. I now use different alloy uprights/calipers/mudguard stays.

Nice low angle shot. though I'd like to modify the slab fronted rack covering panel into something more reminiscent of an MG J2, so will one day!

I'm seriously into louvres for aesthetics. These are CNC stamped and I bend the bonnet halves. Note the chrome on brass vintage style bonnet catches. The plastic wing mirrors can be changed after the UK MSVA test, perhaps for vintage styled chromed mirrors.


As can be seen, this is a barrelback model, to which a spare front wheel can be attached. The barrelback model was introduced by Morgan in 1936, and all of their F types with side valve Ford engines were barrelback, though I have seen one specially modified into a 
Beetleback.


Here is what we mean by barrelback...a bit like a barrel. Different rear side lights could be used. Note the standard Moto Guzzi supplied silencers and simple fittings, though not all silencers are like this. For the UK MSVA test, the rear wheel and aero screens are left off, though they are added once the test has been passed.


Most kits and cars are the beetleback model and a barrelback is a very nice option all round.


Louvres look magnificent!

The client did his own upholstery, although I supplied the bucket seats trimmed. He made his own plywood dashboard though covered the aluminium rear bulkhead panel. The panel is detachable via Dzus fasteners, enabling the whole rear fibreglass cover removable, which is also held down by 4 Dzus fasteners.
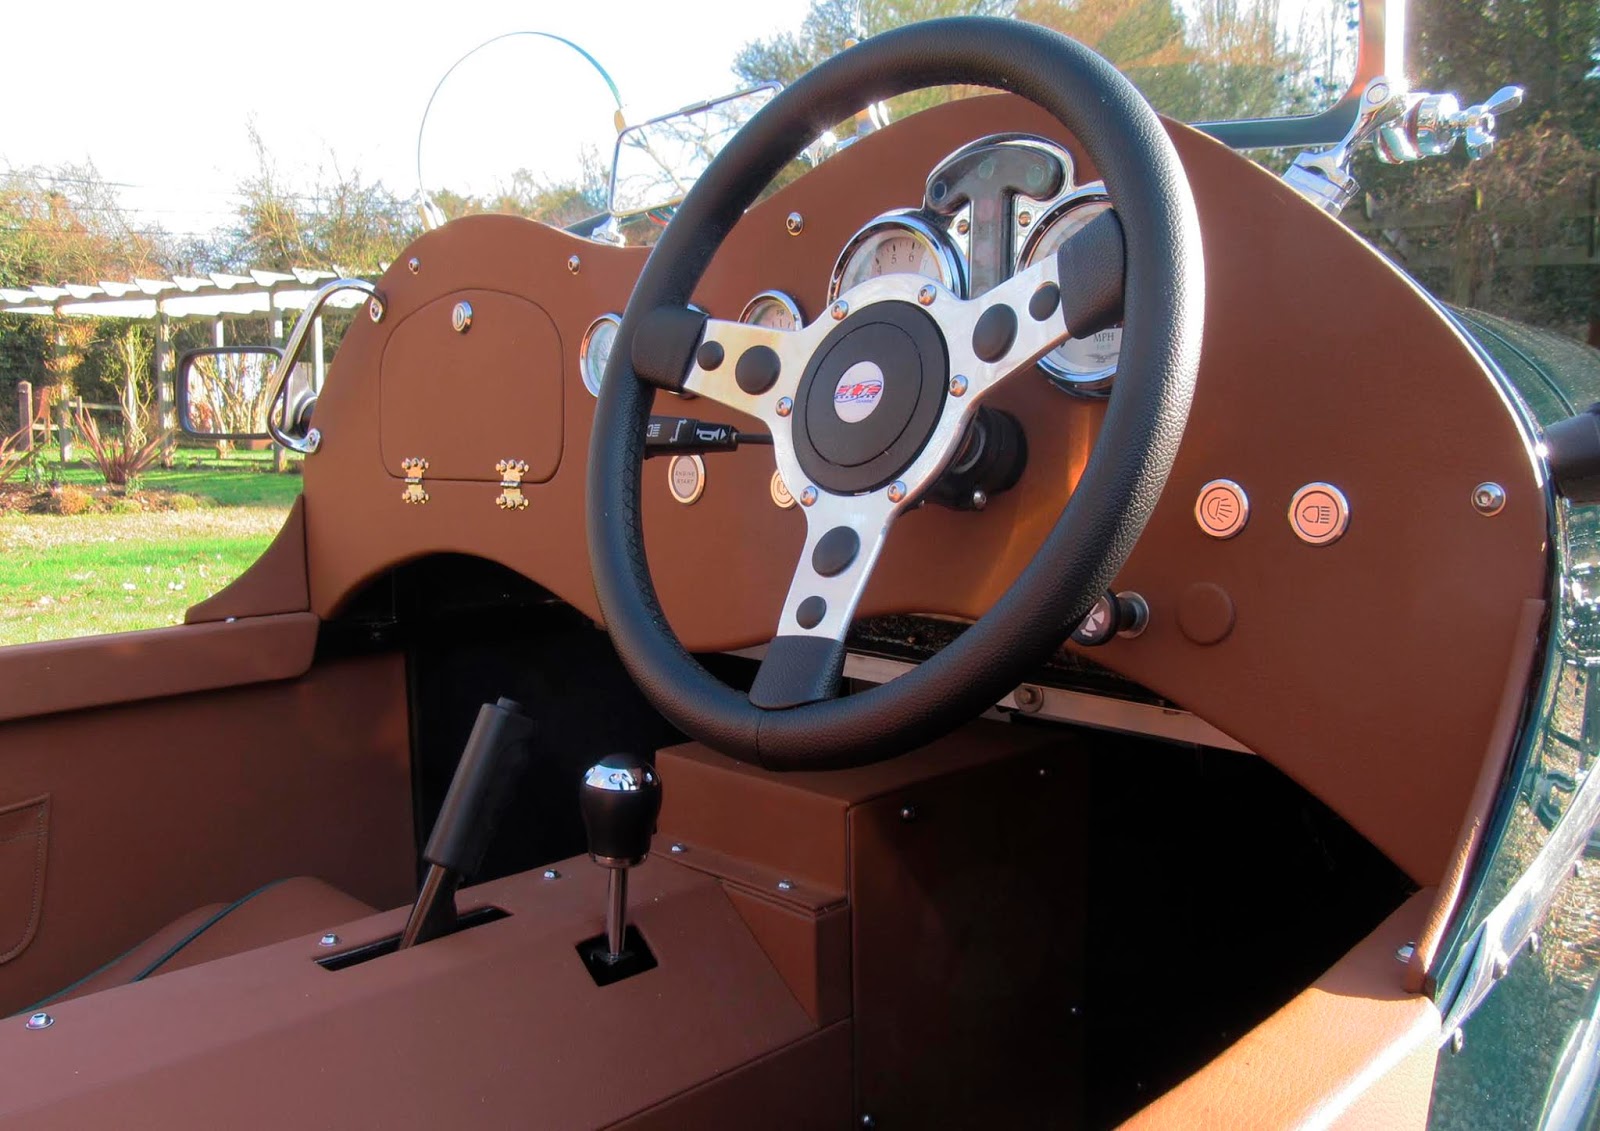

Dashboard and interior close up. The steering wheel could be changed for a vintage styled Motalita type. The reversing gearbox lever is out of shot.


Front end shot. Note that the client has infilled the nose cone with chequered mesh. Note the "propellor" motif aluminium sheet fitted to the front of the scuttle and the fuel tank from the same material. I was inspired by the underbonnet area of many Bugattis, though there are generally "engine turned" alloy.


Front end again, louvres a plenty.


Forward looking interior shot, note detail.


The client is a stickler for detail and moved the aero screens closer to the dashboard than I normally do, and this was very simple indeed. He did this by raising the aero screen plinths on small alloy spacers.


Alloy spacers to raise the aero screens over the scuttle hums, thus moving them closer to the driver and therefore higher. Though doubled, I shall have some laser cut.


Here it can be seen that the client doubled up with spacers on the outer fitment and just a single one on the inner fitment.


Detail!


Nice front end shot. Note the polished rocker covers. On later engines in the 2000s, these covers are often painted grey.


The client made some superb armrests.


Not just a nice touch, but makes access/egress easier as we age!


Louvres again plus detail in the bonnet catch fittings, stainless steel main side panel rivets, polished alloy exhaust side clamps, and polished trim pieces. The client had his panels painted off the car, fitting the main side panels once painted, hence the stainless rivets. Talking of rivets, I recommend using 4.8mm rivets for the outer panels as the heads are almost identical in diameter to 5mm socket button head screws, and just look so much better and neater.


Overhead front view, showing very pleasant detail all round.


Front wishbone set up. Note top wishbone spacers allowing the wishbone to sit rearwards thus allowing 6.5 degrees of castor.


Stainless steel tie bar, add badges to it...after the MSVA test pass only!


The eagle spreads its wings.


1064cc V-Twin 90 degree engine.


Polished rocker covers, note the client modified "knee protector".


Front bulkhead panel.


Big pots!


MG TA style wheels with MG hex spinners....you can change these for eared spinners after the UK MSVA test.


Front end, note indicators that I fit to the headlight bowls. Quite a complicated fitment, but it ensures that  all lighting wiring goes into one place only.


Bonnet catches, stainless steel rivets, exhaust side clamps. Thats it folks, get your wallet out, and order a kit!

As an introduction though, why not go to the Blog overview first.

www.aerocyclecars.com

Under bonnet view of electrics, fuel system and general layout etc.

Please note that these photos show the layout in my original demonstrator car which I sold a few years ago. I quite liked the layout, but in my next demo car, I shall do better. You'll note that the panels are all my aero deck embossed panels which are a special extra only and have featured only on two cars. You can see a plastic bottle ( a shampoo bottle with top cut off) as a "catch tank", you can do much better than this (note to self!) and Car Builder Solutions (UK) www.carbuilder.com sell one www.carbuilder.com/uk/mini-oil-catch-tank

These are just suggestions, you might come up with better ideas.


Overall under bonnet shot showing basic layout in the electrics box. Note position of coils etc. You might wish to use stainless steel braided fuel hoses throughout, again www.carbuilder.com/uk/stainless-braided-ethanol-proof-fuel-hose-10mm-38
Car builder sell stainless braided hoses in other sizes too.

Electrics box 2, Note small ECU (bottom centre of box).

Electrics box 3, Opposite end of the box, note bike loom fuses fitted to interior of box front.

Electrics box 4. Note overall layout, both coils. Note also that I've fitted an easily accessible battery cut out switch (black) fitted to the negative side of the battery.

Under bonnet 1. Shows RH coil and after market return filter, sometimes the bike has one fitted close to the tank, depending upon model of the donor. Notice original plastic filter box, which I cut down to fit.

Under bonnet 2. RH side.

Under bonnet 3.

Under bonnet 4. General layout. Note tatty piece of velcro in the bonnet recess of the nose cone (crap!), you're better off using vintage bonnet tape, in fact see underbonnet shots of www.aerobarrelback.blogspot.com 

Under bonnet 5. pretty self explanatory.

Under bonnet 6. General layout, however, brake lines are the wrong way around. Front to front brakes, and rear to rear brake is correct, not as shown. Pedal box has slightly changed now. When the pedal box is in its rear most position for short arses (like me, 5ft 5 ins), the end of the  master cylinder  will hit the removeable scuttle panel (not shown here) and accordingly, you will need to drill a small hole to accommodate the end of it.


Pump and filter 1. If you remove the front RHS detachable panel, you have a horizontal panel upon which you could mount the pump and filter as shown above.

Pump and filter 2.

Pump and filter 3.


Here you can see the CBS catch tank mounted behind the RHS detachable front louvred panel on a client's car.


Braided stainless steel fuel lines on a client's car.

General under bonnet shot of a client's car.

K&N styled air filters on a client's car.

Looking forward under the bonnet of a client's car, note the vintage bonnet tape stuck to the scuttle lip.

Close up of master cylinder area of a client's car.


Forward under bonnet area of a client's car. Note vintage bonnet tape stuck to nose cone lip. The client has also retained the polished "knee guard" pieces around the barrels, though he had to modify them slightly.


Sunday, 14 April 2019

Gear change mechanism

As an introduction though, why not go to the Blog overview first.


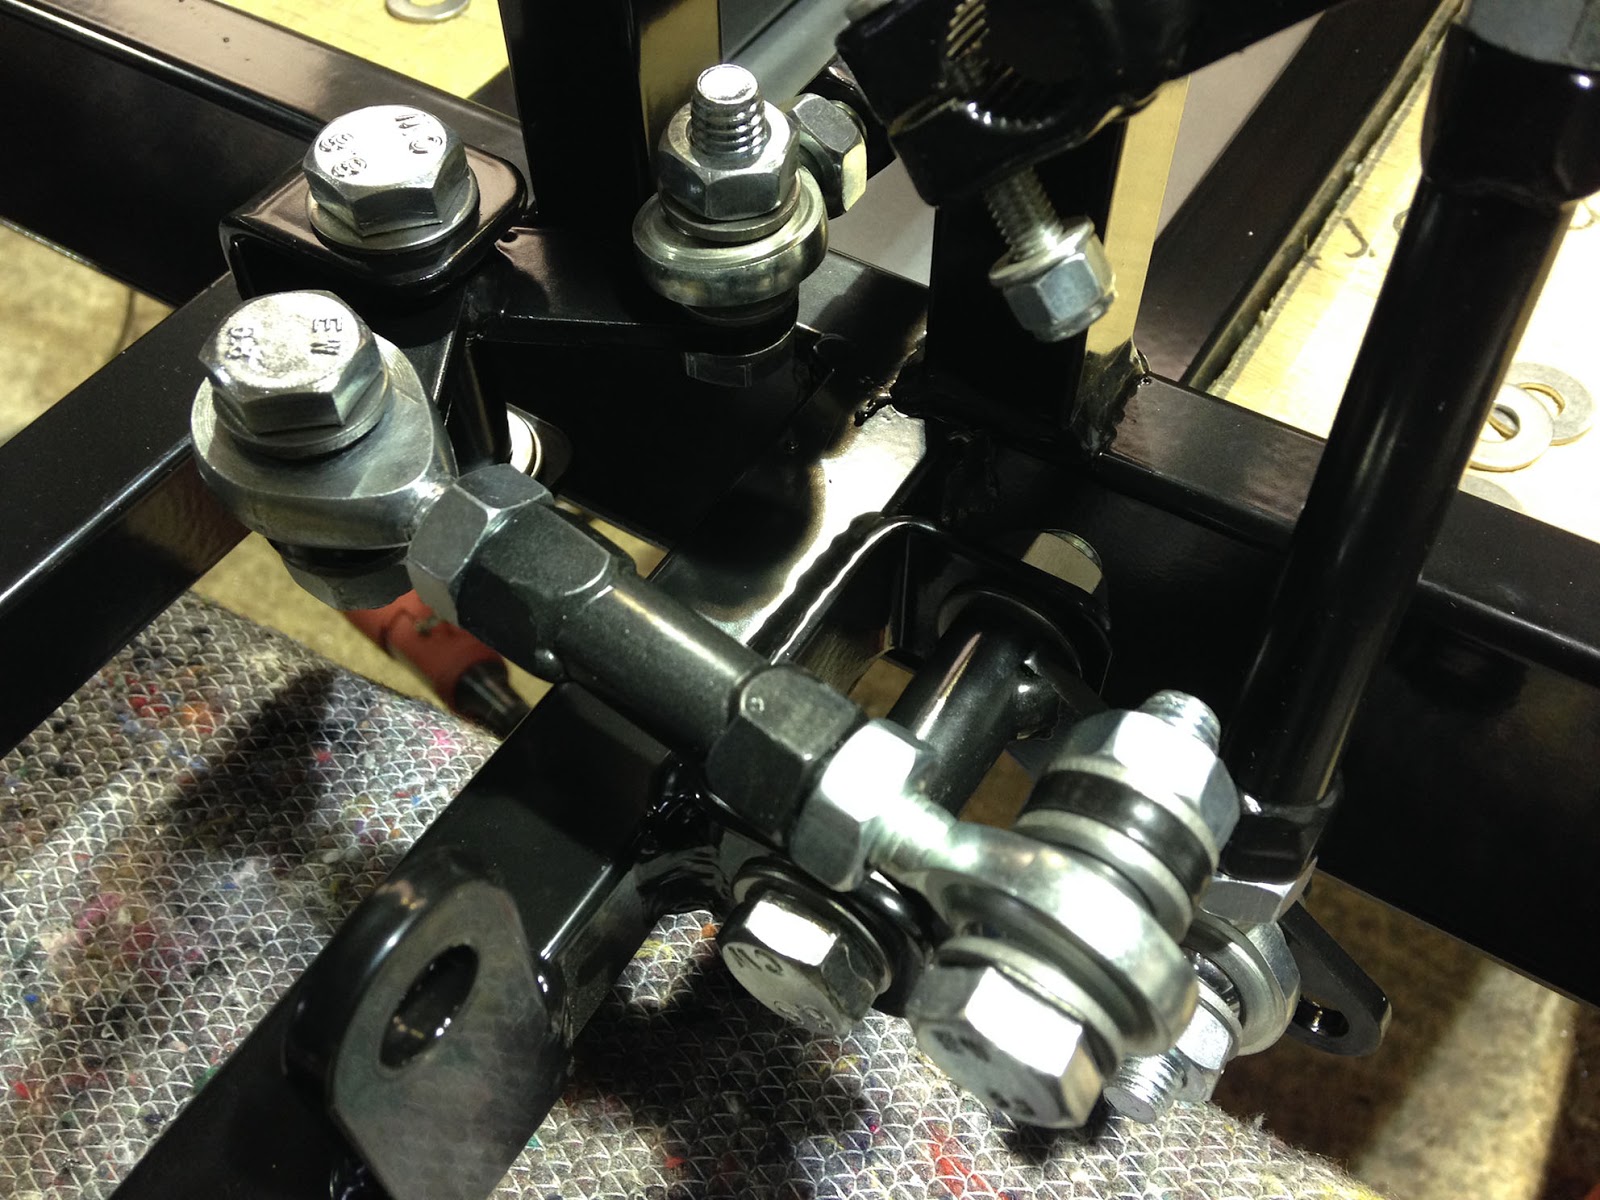
This is the lower arm. Note the rose joint fitted to the front of the arm. Use nylock nuts throughout.


Note the rose joint fitted behind the gearbox link arm. Note also the 6mm bolt on the splined end of the arm. Although it screws into a threaded housing, always add a nylock nut to prevent it working loose. One client omitted this nylock nut and the bolt worked loose meaning he couldn't change gear, so he limped home in 5th gear (!) and burnt his clutch out!


Note basic layout.


Note the 6mm bolt and nylock...again, don't forget it!


Note layout.


Note central hole layout.


Note layout.


Basic layout.


Note layout.


Note layout.


Note gear change lever set up and long rod. All rods have a left hand and right hand rose joint each end so rotation of each rod shortens/lengthens accordingly and then each end should be locked off. Set up is initial trial and error, but once set up to the mean it works well.

Friday, 13 January 2017

                                 New lower mudguard stays:   www.aerocyclecars.com

As an introduction though, why not go to the Blog overview first.

Well, here we are, back on the blog (!) once again, and a Happy New Year (2017) to constructors and enthusiasts alike. It was a funny old December, UK Parcelforce lost a client's pair of bucket seats that I'd ordered and paid for, then 3 weeks later mysteriously found them again in a restaurant in London! This had held up progress, so I spent the time on my aviation interests, then went walking in Derbyshire over Christmas. So, fired up with renewed enthusiam, off we go again.

A word of warning, in my 61 years, I've discovered that enthusiasm can get the better of one. I changed wheels and front uprights/calipers/discs last year, then modified mudgards and as a consequence had to modify the mudguard stays. Curiously, having mounted a mudguard up, I then went to attach a brake line and found that my enthusiasm had completely masked the brake line entry point into the caliper. I had to rapidly re-design the lower mudguard stay, which meant waiting around 3 weeks for them to be laser cut....another delay last December.

Safety Update 24/10/18: The 20mm M6 SCH screw/bolt  that holds the front mud guard upright should be changed to a standard 8.8/12.8 SCH screw/bolt as stainless steel SCH 6mm screw/bolts in this position have been found to shear.


  Here then is the new lower stay with a 40mm diameter curve laser cut and shaped.


Close up showing the brake line entry hole previously covered up! This now necessitates new hose line fittings into the caliper which will have to be right angled. The stay might have to be reversed so the curve hangs down, not sure yet until the fittings arrive next week. These stays are supplied in a kit unpolished and will definitely look very good when polished up. On full build cars, they will be polished, so these will come off again and be refitted once done.


Reversing the stay is now the correct position.


Inserting a short banjo and bolt is WRONG. You can see that the swivel nut is hard up against the caliper.


An extra long banjo and bolt clears the caliper nicely.


I didn't like the idea of leverage, so decided to hold the flexible brake pipe using a P clip and 6mm SBH (socket button head) and nylock nut and washer on the opposite side. Mark 50mm centred from the bolt into the alloy upright, then drill a hole. Bolt up all round and check the tightness of the banjo bolt and that everything clears suitably.


From the rear of the stay, here is the P clip, nylock nut and washer. Don't forget that you'll want to polish the mudguard stays before application.